So, you’ve got your hands on the slick iPhone XS, and bam! You’re hit with the dreaded iPhone XS Locked to Owner message. Frustrating, right? This tech snag isn’t just a wild dance your phone decided to do—it’s often tied to iCloud activation locks or previous owner details still hanging around. But don’t sweat it! This guide will break down why this pesky problem pops up and serve you some sweet, simple solutions to get that iPhone XS grooving again. Ready to dive in?
The Reasons Your iPhone XS Gets Locked to an Owner
Navigating the world of iPhones can be a smooth sail, but occasionally, unexpected snags like the locked to owner message can toss your boat. It’s not just some random tech problem; various factors could be causing this. Before we deep dive into the intricacies, it’s crucial to understand the main culprits behind this issue. Ready to uncover the mysteries behind your locked iPhone XS? Let’s break down the top reasons why your phone might be playing hard to get.
Forgotten iCloud Password
When you forget your iCloud password and decide to reset your device, it might lead to the iPhone XS Locked to Owner situation. This typically happens because a password is needed for the re-activation phase. Without it, the phone becomes an inaccessible gadget, and you’re left wondering what to do next.
Second-hand Device Reset
If you’ve acquired a pre-loved iPhone and decided to hit that reset button on your own, you might just run into the locked to owner predicament. It’s crucial to ensure that any previous data or accounts are entirely wiped off before making the phone truly yours.
Unintended iCloud Retention
Sometimes the locked to owner issue arises simply because the last person to use the phone didn’t properly sign out of their iCloud. A tiny oversight like this can tether the phone to the previous owner, causing quite a bit of confusion.
iCloud Activation Hurdle
The iCloud Activation Lock is a nifty security feature, but it can be a thorn in your side if not handled correctly. This feature causes the locked to owner message that welcomes you on your screen if it detects any suspicious or unauthorized attempts to access the device.
Purchasing Stolen Goods
It’s a sad scenario, but if you’ve unintentionally bought a stolen iPhone, the device might display the iPhone XS locked to owner message. Stolen phones often have security measures kicked in to prevent unauthorized access, and the previous owner’s details can become a persistent block.
Ways to Fix an iPhone XS Locked to Owner Message
Ever landed in the iPhone XS locked to owner situation? It’s a bit like being handed the keys to a shiny car, only to find out they don’t quite turn in the ignition. Frustrating? You bet. But just like every riddle has its answer, every iPhone glitch has its fix. Whether your phone’s stubbornly clinging to a past life or some digital ghost’s causing mischief, there’s a workaround. Stick around, because we’re about to dive into an array of solutions to get that iPhone XS dancing to your tunes again. Ready to break those digital chains? Let’s dive in!
Method 1. Ask Support from the Previous Owner
Now, I get it. Your iPhone XS behaving like it belongs to someone else? Quite the pickle, huh? But before you toss it into the tech void, consider reaching out to its previous owner – they might just have the magic touch.
Step 1: Gathering the Essentials
Start your quest by hunting down some key information: the device’s serial number, IMEI number, and any documentation that shows your ownership of that iPhone device. These golden nuggets can make the rest of the process a breeze.
Step 2: Find the Seller’s Contact
No psychic abilities needed here! Just trace back where you got the phone from. Maybe it’s an online store, a physical shop, or even a pal. Grab their contact details; you’re going to need them.
Step 3: Explain the Situation Clearly
Let’s be real – no one likes confusion. Once you’ve got the contact, give a clear rundown of the iPhone XS locked to owner problem. The clearer you are, the faster things can move.
Step 4: Unlink the iPhone from the Seller’s iCloud
Here’s where things get a tad techie. To ensure that you’re completely free from the seller’s account, walk them through these steps:
- Guide the seller to log into iCloud.com.
- After a quick hop into “Find iPhone,” they’ll spot the locked device.
- A click on “Erase” followed by “Remove from Account” should do the trick.
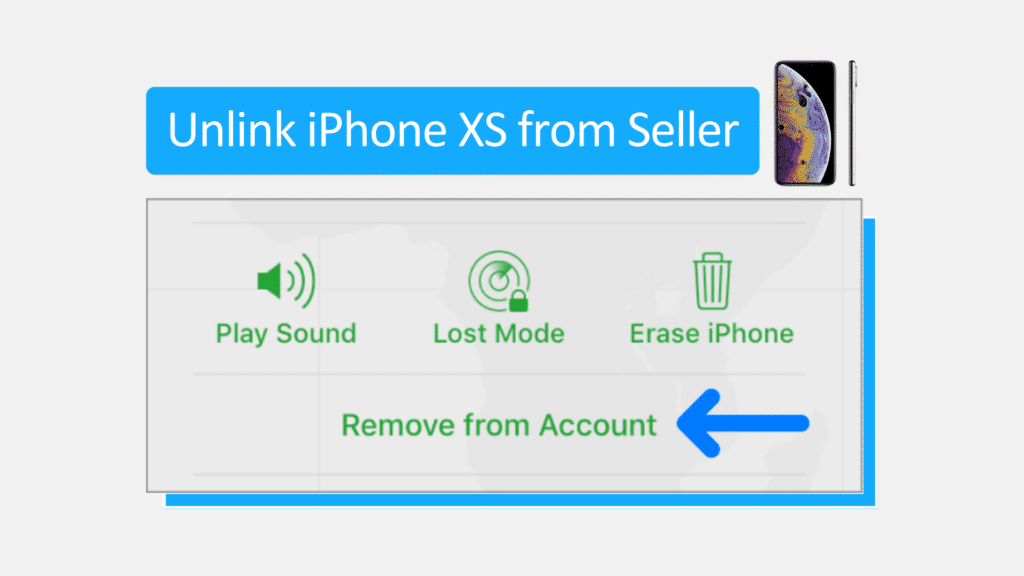
Voila! You’re free from the seller’s digital embrace. It’s a journey, but by the end, you and your iPhone XS should be two peas in a tech pod.
Method 2. Speed Things Up with Unlock Maker
Tired of the iPhone XS Locked to Owner runaround? Sometimes, the tech world throws us a lifeline in the form of efficient tools. Introducing Unlock Maker—a speedster in the unlocking game. Not only does it promise a swift solution to your iPhone lock issues, but it also offers this turbo service without costing a dime. So, if you’ve been pulling your hair out over the lock issue, it might be time to give this tool a whirl. Ready to leap into action? Let’s get that iPhone XS unlocked in a jiffy!
Step 1: Beginning the Unlocking Journey
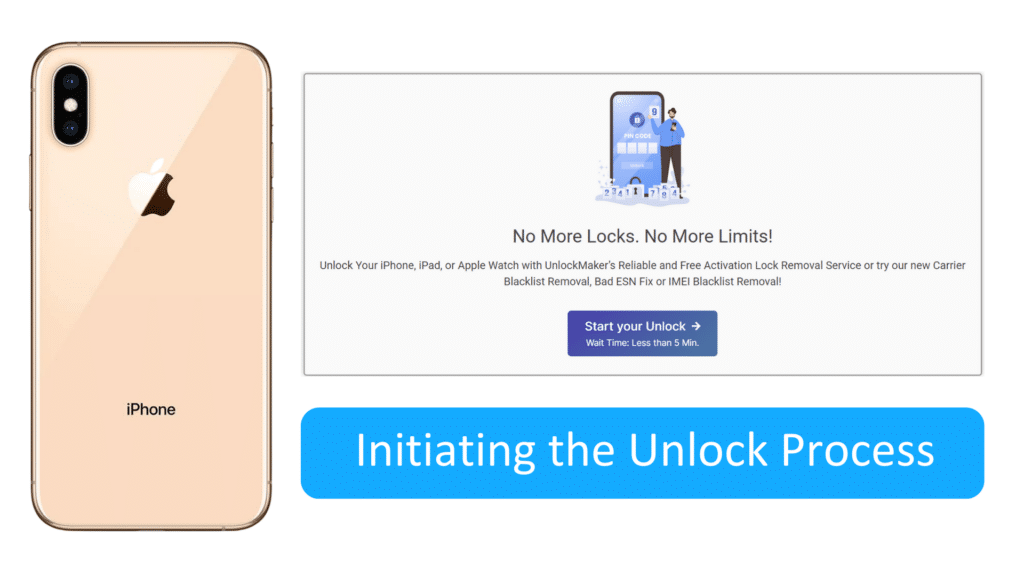
Just give that button below a gentle tap, and you’ll be on your way to remove that locked to owner message on your screen.
Disclaimer: We do not condone using this app to remove the iCloud activation lock feature on stolen property. If you believe there’s something sketchy with an iPhone you recently bought, make sure to act accordingly and contact the authorities.
Step 2: Filling in Personal Information
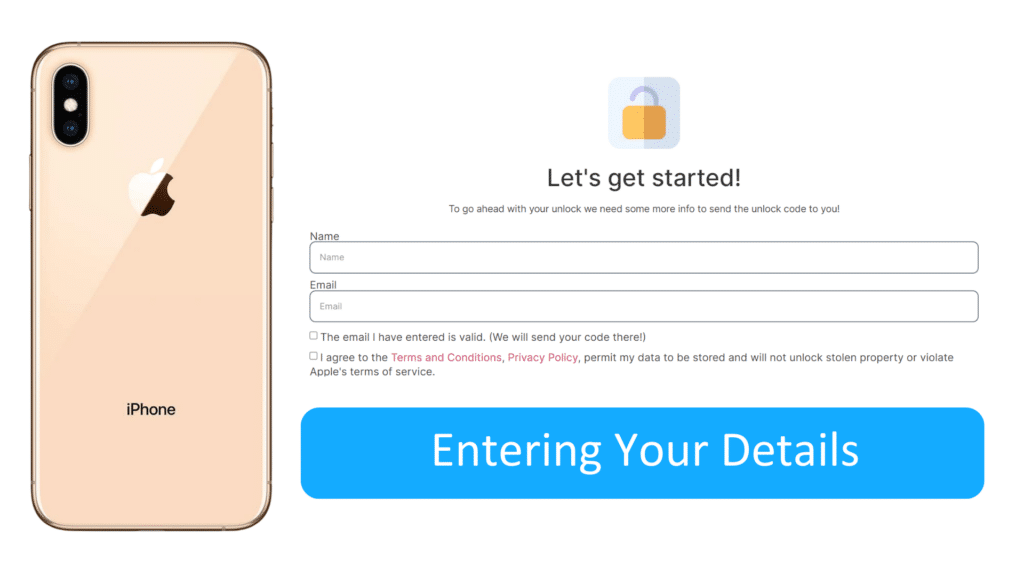
Time to get personal—but not too much! Type in your name and email, ensuring every dot and dash is accurate. This guarantees you get all the follow-up instructions. Oh, and a gentle reminder: ensure your email is ticked as valid and skim through our Terms and Conditions and Privacy Policy. It’s always good to know the rules of the game.
Step 3: Selecting iPhone and its IMEI
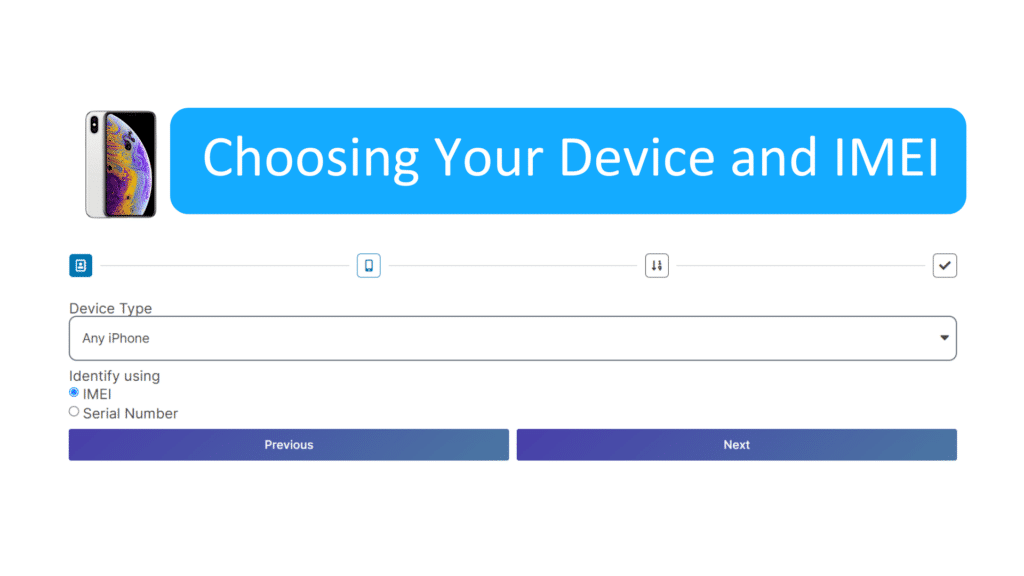
You’ll now see three options:
- Any iPhone
- Any iPad
- Any Apple Watch
Given we’re sorting out an iPhone XS locked to owner issue, “Any iPhone” is your best friend here. Next up, you’ll have to juggle between IMEI and Serial Number.
Pro-tip: Every iPhone comes with an IMEI number. iPads and Apple Watches also have IMEIs, but only if they’re cellular models. Non-cellular versions just have a Serial Number. If you have the option, always opt for the IMEI, but if it’s not available, go with the Serial Number. Once chosen, hit “Next” and strut forward.
Step 4: Identifying and Providing IMEI or Serial Number
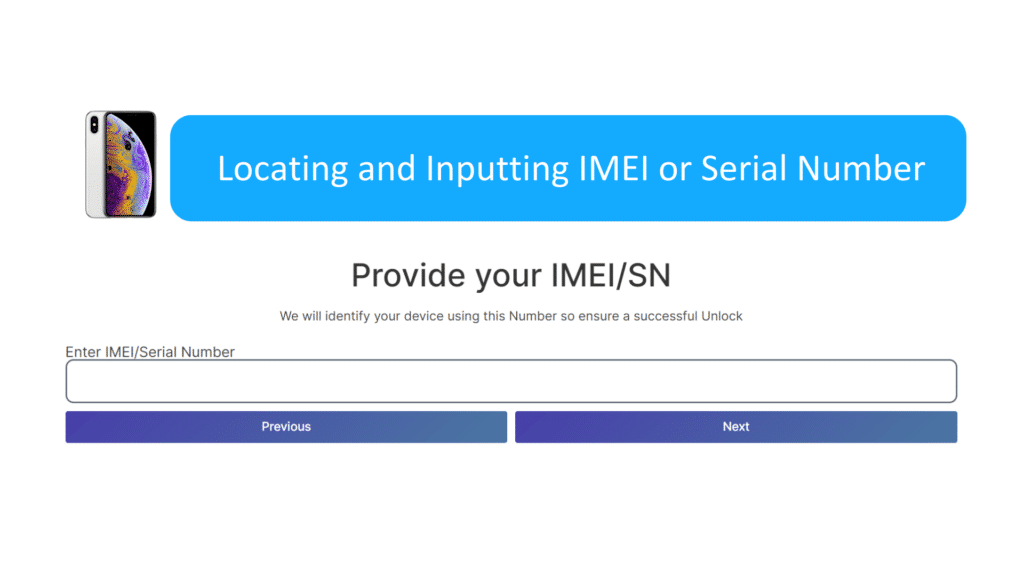
If you’re scratching your head over what an IMEI is, fret not! Here is a concise guide to help you:
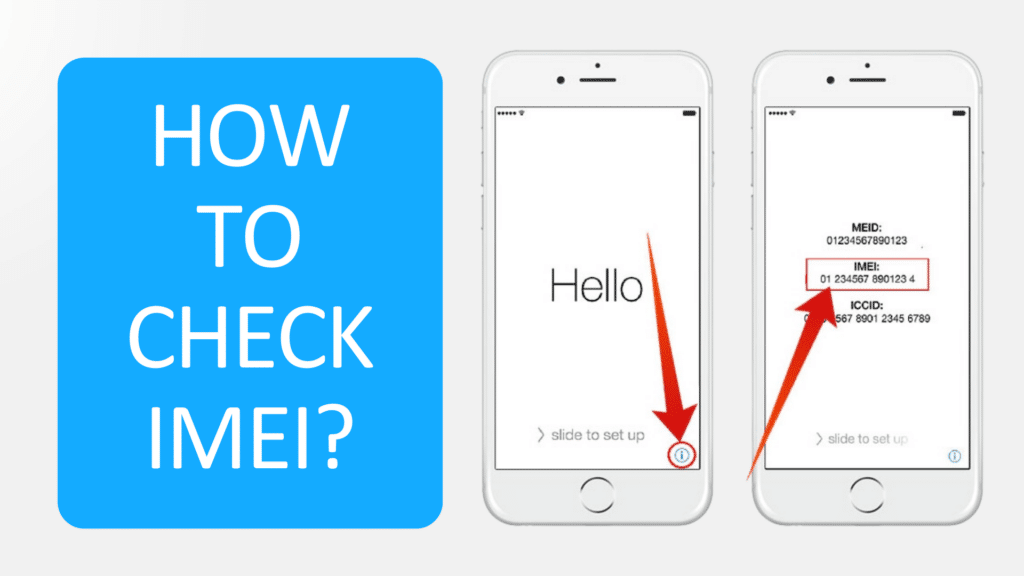
- Navigate to the iPhone’s activation lock screen.
- Give the sleep button on the side a quick press.
- After a restart, you’ll spot the IMEI and SN code, bright as day.
- Jot down the IMEI, pop it into the UnlockMaker app, and click onward.
Step 5: Creating your Unique Login Credential
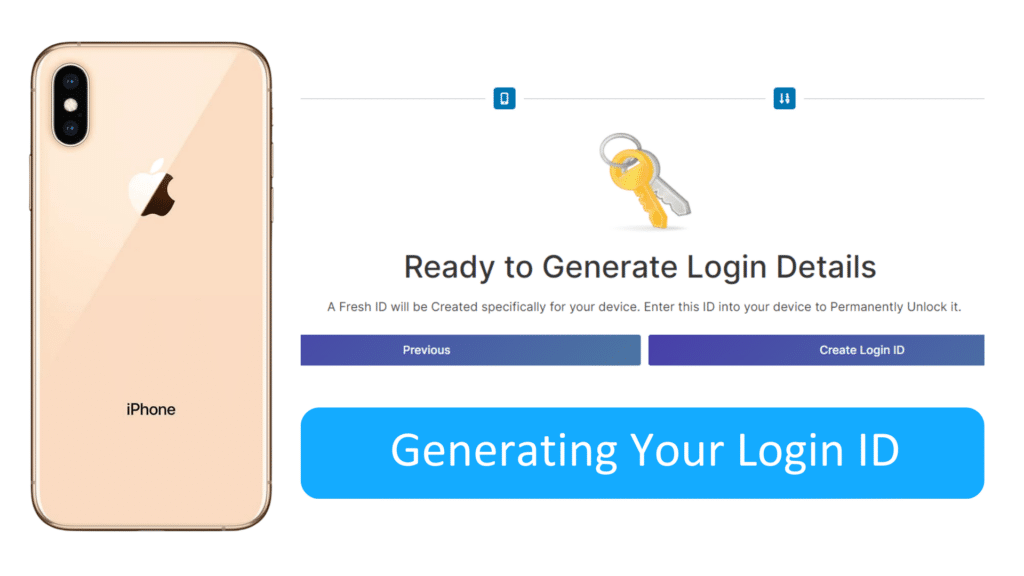
You’re almost there! With the heavy lifting behind us, it’s time to generate your unique Login ID. A simple click on “Create Login ID” should do the trick.
Step 6: Verifying Email for the Unlock Procedure
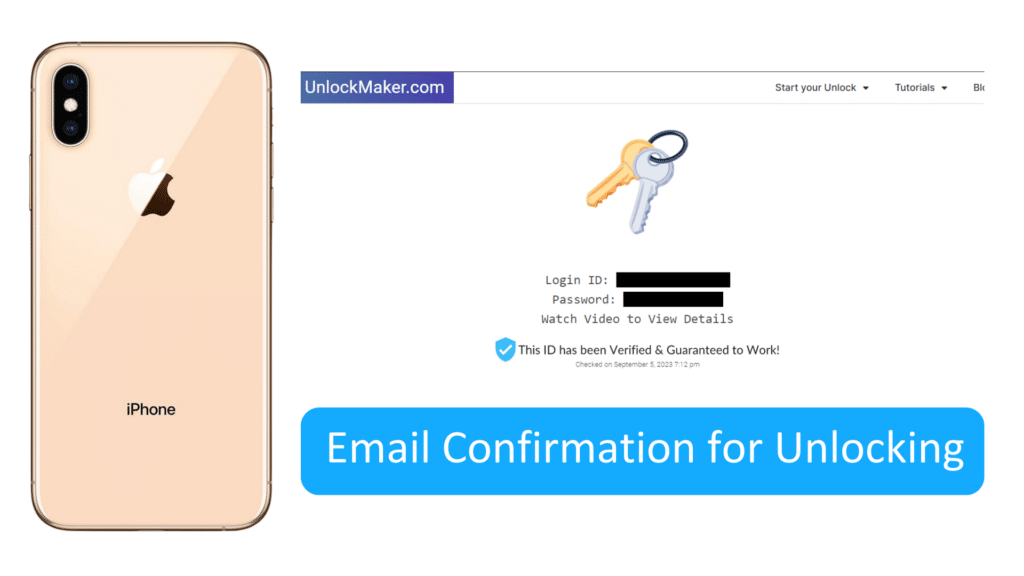
Just to keep things on the up and up, reconfirm that email. Remember, it’s not just about getting the unlock done; it’s also your hotline to any more guidance you might need.
Step 7: Dive into the Video Tutorial and Download Your Login ID
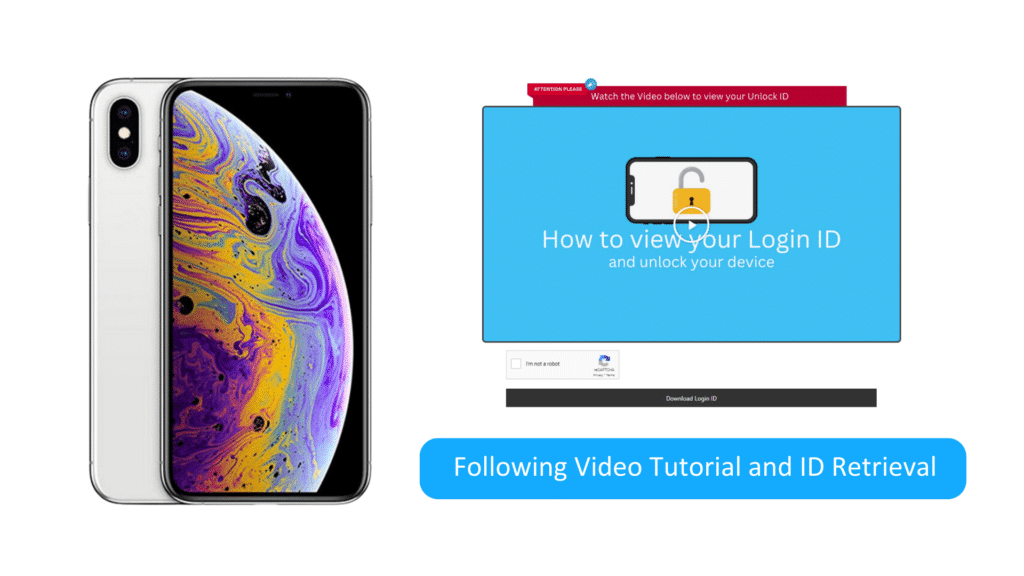
Before the final stretch, it’s tutorial time. Get the lowdown on unblocking your ID with a helpful video guide. Post-CAPTCHA, tap on “Download LogIn ID“, and voila, a PDF with all the login details you need will land in your downloads.
Once you breeze through these steps, your iPhone XS can now:
- Add your own apple ID.
- Do updates and download apps.
- Do phone calls, and many more!
- Function like a brand new iPhone without restrictions.
Tips and Precautions

Navigating the tech world, especially when you’re dealing with a problem like locked to owner message, can be a bit of a maze. We’ve all been there—hyped to use our shiny new gadget, only to be met with a lock screen that just won’t budge. But like every tricky situation, there’s always a silver lining. The trick is being prepared and aware. Let’s delve into some tips and precautions to ensure your iPhone experience is nothing short of smooth.
1. Stay Updated with Software
You know the drill—updates might seem pesky, but they often come packed with essential security enhancements. Keeping your iPhone XS up-to-date can ward off potential issues related to it being locked to an owner, and provide you with better defense mechanisms against potential security threats.
2. Double-Check Before Purchasing Second-Hand
Buying second-hand can be a great bargain, but when it comes to iPhones, it’s essential to play safe. To avoid the dreaded iPhone XS locked to owner issue, always ask the seller to remove their iCloud account in front of you. Also, ensure the phone isn’t reported as stolen or lost.
3. Regular Backups are Lifesavers
Let’s face it, data is precious. Regularly backing up your iPhone ensures that if something goes sideways and you do get locked out, you won’t lose all your memories and crucial files. With backups, even if you have to reset, your data’s safe and sound.
4. Activate Two-Factor Authentication
Take your iPhone XS security up a notch. Two-factor authentication is like that extra bolt on your door—giving potential hackers a harder time. By activating it, even if someone has your password, they won’t easily gain access, keeping the locked to owner issues at bay.